
Hi fellow creative sewing ladies,
I thought we should do a sew-along. I'm going to make a new shirt (View B) from our At Every Angle pattern, and I thought you might like to join me. Here's the pattern--
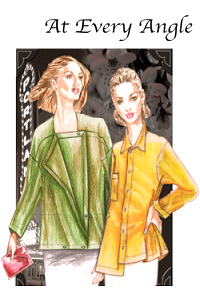
This is such an interesting shirt. The hems are asymmetrical, it buttons left over right, and the collar is asymmetrical. Also, it has roll-up cuffs and a pocket. (See the last paragraph of this blog about sizing.)
Here's the fabric I've chosen (FF-01480). It's a lively print with lots of color and should be fun to wear. I've decided to match the print down the center front and center back, just to add that high-end, professional touch. If you haven't tried that, read on. I'll show you what I did.

After placing the main pattern pieces on the fabric in a few different ways, I realized that I would need to cut them on the cross-grain. In other words, the pattern pieces would be placed with their length going across the fabric rather than up and down the fabric.
It's not always possible to do such a layout, but in this case it's fine. Because the weave is even and the fabric is tightly woven, the crosswise and lengthwise grains will act the same way on the body. Just remember that you can't do this with all fabrics.
So I began by placing the Left Front where I wanted it. Again, this shirt buttons left over right, so this was the important piece. Also, when matching fabric motifs on a garment that will button, the match must be at center front.
Here's how that piece looked when placed on the fabric. I decided to have a row of the circles run down center front. Look carefully. You can just see the buttonholes marked at center front on the pattern. That's where the match must occur. Also, you can see that I drew around the circles where the match must occur.

Once that piece was pinned in place and couldn't move, I could match the Right Front to it. I placed the Right Front on top of the Left Front, matching center front and the neckline, and I drew the same circles on the Right Front (I could see through the pattern to do this. It's one reason I prefer tissue paper patterns.) Then I located the same circles elsewhere on the fabric and pinned my Right Front in place.

I followed the same procedure with the Back pattern pieces. First, the Left Back. I should say that there is a center back seam, which is why I had to match the Backs. Again, I drew the circles.

Repeating the process I used for the Fronts, I laid the Right Back on top of the Left Back, matching the stitching lines 5/8" in from the edges of the pattern pieces as well as the neckline. Of course, I again drew the circles on the Right Back so I'd know where to place it on the fabric.

Oh, and I repeated the process for the Pocket. I laid it on the Right Front, which was pinned in place. I matched the dot on the pocket to the correct dot on the pattern, then drew on the pocket the circles that showed through. That allowed me to find those same circles elsewhere and pin the Pocket on those circles.

Ok. So let's look at the total layout, and I'll explain a couple of things about it.

I had to put the fabric on the floor! And I don't do this as easily as I did when I was in high school--but it was worth it. So-the Left Front is at upper left in the photo. The Left Back is next to it. Right Front is the next piece, then the Left Back.
On the bottom, you can see one Sleeve pinned on the lengthwise grain. This is fine because, as I said earlier, this is an even weave and a tightly woven fabric. The long Collar piece is next, then the Pocket on the proper circles. The blank space above the Collar is where I'll cut the other Sleeve. I should also say that because of the nature of this all-over, non-directional print, no one will realize that the Sleeves have been cut on different grains.
I hope this helps you understand matching fabric motifs. I hope you will also join me in creating one of these shirts. I'll be showing you how I stitch mine in upcoming blogs.
At the beginning, I said I'd mention sizing. This shirt is intended to be somewhat oversized. It's just part of the fun look of the shirt. Please look carefully at the Finished Garment Measurements on the envelope. Compare your body measurements to them. Decide how much ease you want, then decide on which size to make. Remember, if you go down a size from the one you usually use, the neck will be smaller too. You might want to cut the neckline and Collar at your usual size.