Hello fellow sewers,
It's time for the next step in constructing the Shirt (view B) from At Every Angle. In the last blog, we ended with beginning to pin the collar to the shirt's neckline, so let's see how that looked.
As a quick review, this collar is somewhat unusual. As you can see in the photo, the collar is slipped down over the neckline of the shirt (in other words, the neckline is inside the collar), right side to right side, center backs matched. At the center front edges, the collar would fold around the fronts and back on itself with the neckline sandwiched between the 2 collar layers. Once both layers are pinned, it's time to stitch.
Look closely at the stitching below. I sank my needle with the fabric turned in the opposite direction and stitched to the end of the collar. Then I turned the collar around as you see below. I like this technique because it avoids the dimple in the fabric's edge that backstitching often causes. Now I'm ready to stitch across the combined collar/neckline. I'll mirror image this technique at the other end.
Same view as above.
Once the collar/neckline seam is stitched, it must be graded and clipped. I've mentioned in other blogs that we now clip on the diagonal. I clipped one layer, then turned the collar/neckline over and clipped in the opposite direction, and so the clips don't overlap. Thus no ridges or gaps press through to the right side.
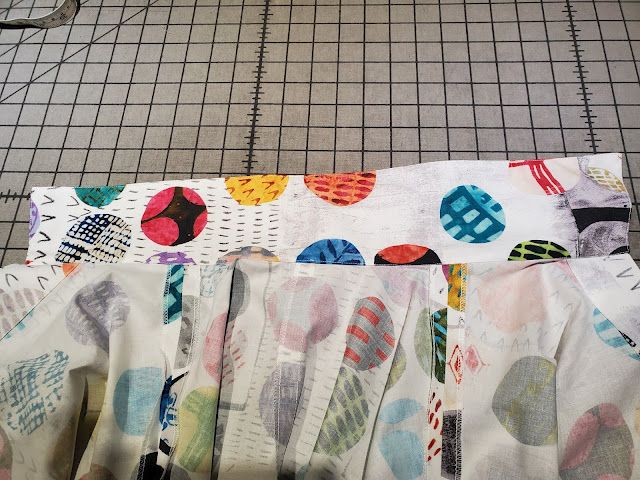
Below, I'm pressing the collar up and away from the neckline of the garment. You can see that the top edge of the collar is open. See the raw edges?
You might be wondering, "How on earth do I close the top of that collar now?" It can be done! Of course, all of this is explained and illustrated in the instructions, but it's helpful to see it done.
You'll roll the front edges of the shirt and pin them out of the way, like this:
Once you've stitched and pressed both ends, you can turn them right side out, using a point turner to walk out the corners. The middle of the collar will still be open. Turn the seam allowances down inside the collar, pressing them carefully so they are even.
Once the pressed seam allowances are perfect, trim them to 3/8". Slide a strip of Steam-a-Seam between them, remove the paper backing, and press to fuse this last part of the collar together. Finally, you'll edgestitch the collar. Work on the side of the collar that will show when worn and begin stitching at center back where the collar joins the neckline. Edgestitch all the way around. You did it!
Next, we'll construct the sleeves. We have different way of finishing the underarms, so I'll show you that in the next blog.


