Hi everyone,
Since Color Me Chic is our newest pattern, I thought I would talk with you about it today.
Color Me Chic
First, I'll show you the envelope illustration.
We've included a jacket that's soft or structured depending on the fabric you select. It's so easy to make that you might want at least a couple of them. (I'll talk to you in another post about the top.)
Louise made her first jacket in the shorter length in a fairly firm fabric. She did not add a fastening to the fronts, choosing to let them drape.
She made her second jacket in the longer length and added a fastening. The versatility of this design is great.
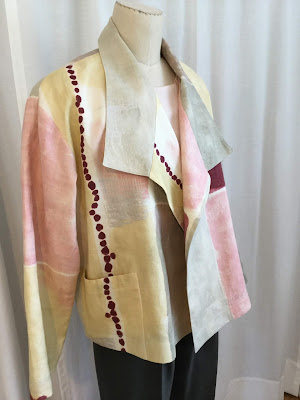
I chose a Japanese linen for my first jacket, so it's a bit softer than either of Louise's jackets. I let the front of my jacket drape, and I love the look. It seems to go with the softness of the colors and print.
I really like the collar worn up, as above, but you can also wear it folded down a little, if that's your preference.
If you've used our patterns for a few years, you may have noticed that we have changed to much deeper back neck facings. They give a collar a much more solid foundation to stand on. And as a bonus, they look really pretty when your jacket is hanging in your closet and you see the right side of fabric in the neckline. Here's how mine looks. It's topstitched in place right next to the serging and just below the collar seam (and yes, I was so short on fabric that I had to piece the facing!).
I'll show you the pocket too. On the shorter version of the jacket, the pocket extends into the hem. On the longer jacket, the pocket stays in the same place, so the jacket extends below it. You would simply finish the bottom of the pocket rather than letting it extend into the hem. As you can see, I managed to match the line of bubbles. Maybe that's why I was forced to piece that back facing!
And here's the view of the jacket showing the pocket in place.
Now that I'm looking at the photos, I've noticed that the "bubbles" echo on the right front facing. How cool is that!? Lucky break for me, as I was so short on fabric.
I wore this jacket in Puyallup and Atlanta this year and was quite comfortable. Give it a try--I think you'll find it easy to make and easy to wear, and you can make lots of variations of it.
You can always contact us at the website: www.cuttinglinedesigns.com. Let me know if you have suggestions for future blog topics. In the meantime, you can join in the conversation over at the Facebook Forum. Louise checks in regularly to answer your fitting and sewing questions, and you can see what other sewers are creating.


