Wednesday, July 31, 2019

Hi, everyone,

I've missed you!  We've been working on a project that we hope you'll be seeing soon.  In the meantime, I thought I'd shed a little light on a simple technique and share a reminder that a pattern is just a starting point for your individual design sense.  

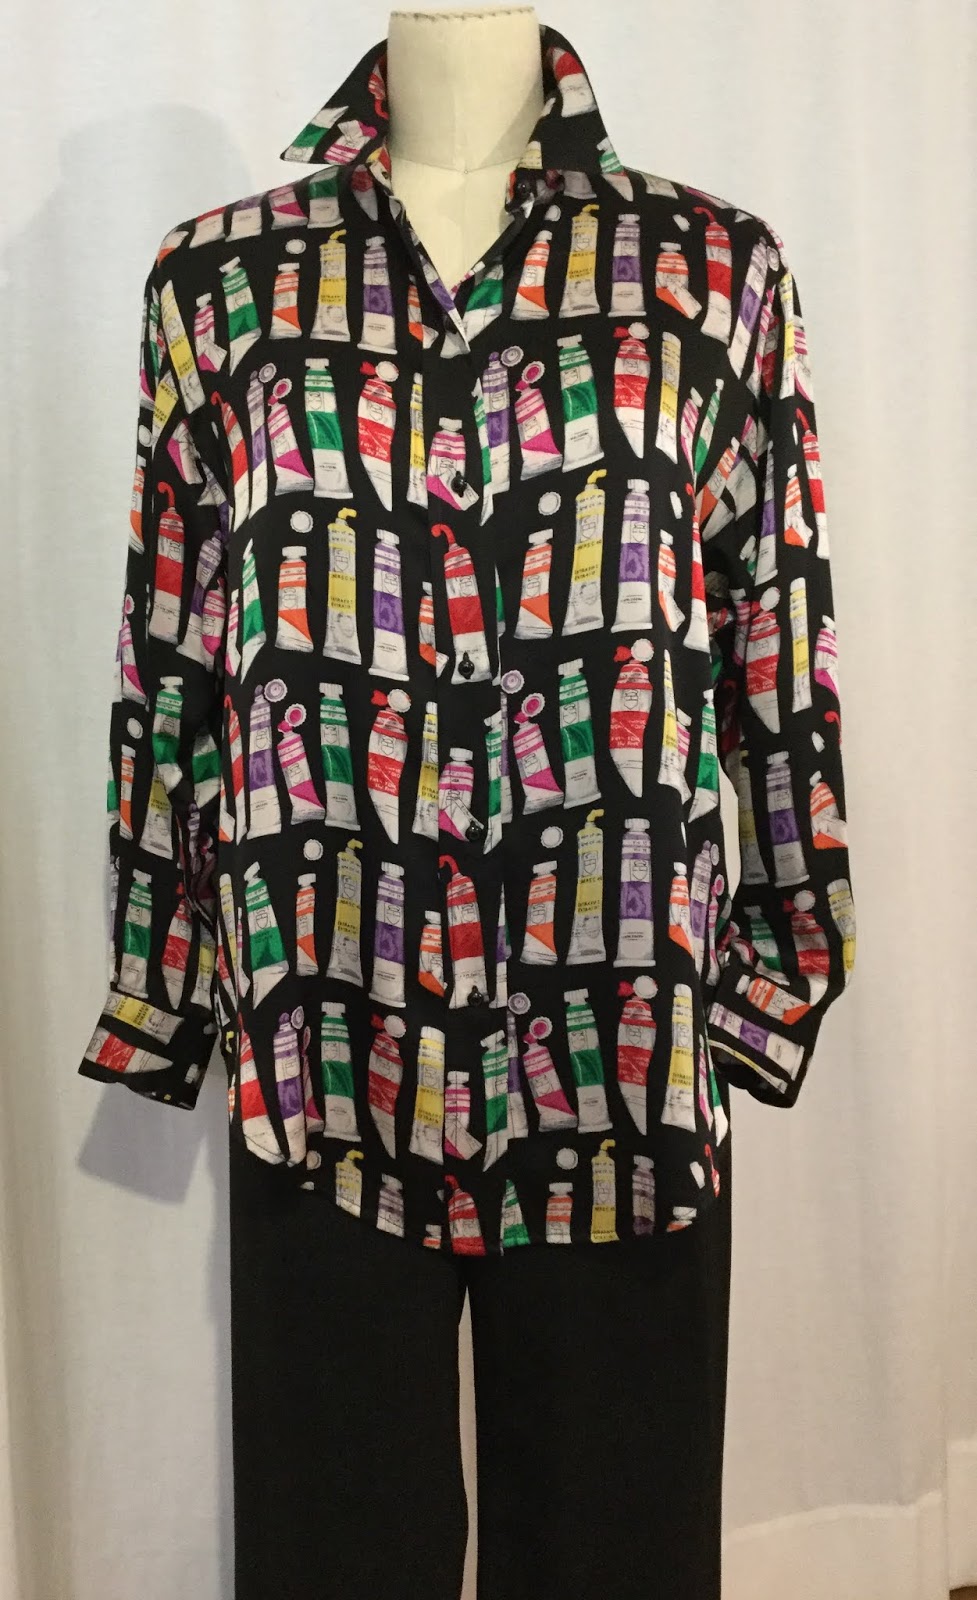
Let's see what that means.  Louise found this coat online (by Gudrun Sjödén) that looks so much like our Anything But Ordinary jacket made longer.  She posted it on the Facebook Forum as inspiration for anyone who might be thinking that she'd like a cute coat this fall.


It's a good reminder that we are our own designers.  So you can choose a jacket pattern, make it longer, and proceed with your own coat.  Choose the fabric, the length, the details, the buttons that you want.  You'd never find that particular combination in a store.

Anything But Ordinary pattern
Notice the similarity between the coat's collar and the collar in the pattern.  This could be made any length and from a lightweight to a heavier fabric---so start imagining.

So here are a few tips about lengthening patterns.  Of course, it's a simple thing, but like anything else about adjusting patterns, it helps to do it accurately.  So here's what I do.

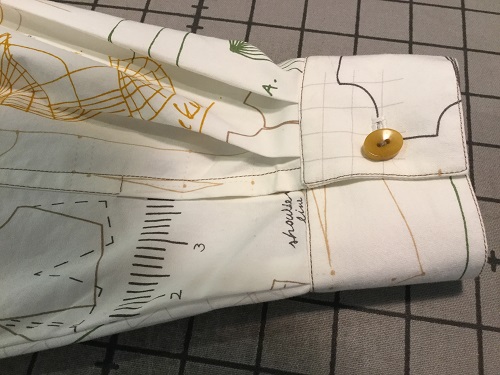
First, I iron the pattern with a warm, dry iron.  No steam--ask me how I know!  I can't get good results if there are wrinkles.


Then I cut the pattern on the lengthen/shorten line, obviously.  (You do have to consider whether that would interfere with pockets, etc. so you could draw a line in another spot if needed.)  Then I slide tracing paper (from a medical supply store; it's really the stuff on the doctor's exam table) under the cut edge of the upper Front.


I won't tell you how many years it took for me to realize that taping the pattern to the tracing paper is so much easier if I lay a ruler right beside the edge I'll be taping.  That way, the pattern tissue doesn't fly up and get stuck on the tape with lots of wrinkles in it.  Ever happen to you?

So if I want to add 2 inches to the length of my jacket, I'll use my ruler to draw an accurate line 2" below the lengthen/shorten line.  But I also continue some relevant vertical lines, like the grainline, center front line, perhaps a foldline.  That way, I can align the bottom portion of the pattern exactly in the right place.


Here, I have the lower part of the pattern below its final placement, just so you can see the lines I drew for the alignment.  

Finally, I tape the lower part in place, using the ruler to hold the edge of the pattern tissue down again.  


They're all such simple steps, but I spent years fiddling with trying to place both pattern pieces before I taped anything down, then using little bitty pieces of tape so I didn't wrinkle everything up.  The extra alignment lines and the ruler placed before taping have just helped avoid so much frustration and ensured accuracy.

One student who attended a retreat with us, and who evidently had the same frustrations, said that the ruler trick was "worth the price of admission."  

So who's ready to start making a coat?  If you do, email us a photo when you're done or post it on the Facebook Forum.  I'd love to see your work.  You can email me at 
sandy@cuttinglinedesigns.com with questions or suggestions for topics. 

I'll be teaching a class in September to show you so many variations on the simple idea of the Boxtop in This or That.

Here's the pattern:

 This or That pattern

And here's my winter variation, a snuggly, warm, sweater-like version to layer over another top.  See the Events page for more details.  I'll be adding more ideas shortly.


.


Monday, July 8, 2019

Hi Fellow Sewers,

As I was posting mostly black and white photos for this week's (July 4-14, 2019) newsletter from cuttinglinedesigns.com, I thought that it could be fun to post some outfits here that started with black and white. 

Some of you may have attended one of my wardrobing classes, or you may know that I filmed a DVD for Threads Magazine called "How to Sew a Travel Wardrobe".

As I did research for the DVD, I came to rely on the principle of beginning a group of garments by using 2 neutral colors.  Neutrals are great because they work well together, plus they work with other neutrals.  

This idea, along with the others I discussed in the DVD, will apply just as well to any wardrobe you might be planning--casual, elegant, work, summer, winter . . . . . 

Suppose you began your own planning with black and white and some patterns from our Cutting Line Designs website:


You could start with a white Anything But Ordinary shirt (using the jacket view from the pattern but in white shirting).  Combine it with black pants from the My Swing Set pattern.
Add a cuff bracelet, a scarf, or some beads to doll it up a bit.  

Or make the jacket view of Anything But Ordinary again, but leave the sleeves off and  . . . ta-da, you have a vest.  So easy.


Sticking with your neutrals, make a top in a print.  This one is View A from the At Every Angle pattern.


So now it's time to branch out to another print--one that has many more colors in it.  Make View A from Timeless and Modern.  Still the same neutral pants.


Once you've chosen a colorful print, you can take colors from it to use as accents, like this:


Look closely.  There's a blush-colored shell from Putting It Together under the shirt.  You could choose several more colors for your wardrobe plan from this print.

Here's another example of the same idea, View A from The Blouse Perfected pattern:


There are red paint tubes in this print, so it's logical to make red pants (One-Seam Pants, tapered).


The paint tubes contain white, so a white skirt from the Putting It Together pattern is in order.  I added a belt, just for fun.


I made this shirt using all French seams, even where I inserted the sleeves into the armholes.  French seams enclose all the raw edges, give an elegant finish, work fine on straight or slightly curved seams, and are not hard to do.  

Let's look at the steps.  First, place your garment pieces wrong side to wrong side.  Serge them together like this:


Open out the garment pieces and press this first step of the seam to one side.  Check your pressing on the back side.


Now put the right sides of the garment pieces together and press the serged seam so it's right at the edge.


Finally, with right sides together, stitch on the sewing machine 1/4" or so from the pressed, serged seam.  Done!


The right side of the finished French seam is at the top.  The seam as it will appear on the inside of the garment is angling across near the bottom of the photo.  Neat, yes?  

Be sure that you take up the usual 5/8" seam allowance as you sew the 2 steps.  Then brag to your friends and enjoy the special beauty you achieved in your garment.

If you have a question or a suggestion for a topic, please let me know by emailing me at sandy@cuttinglinedesigns.com.


Thursday, July 4, 2019

I hope all of you are having a wonderful holiday with friends and family.  Get out of the kitchen for a while, have some ice cream, and cover your ears during the fireworks!

When you're not busy with all of your celebrating, take a look at the photos I've posted below.  I wanted to give you just a bit more detail about the some of the stitching we included in Pick Stitch Perfect, our newest pattern.


First, I wanted to emphasize that you can rely on machine stitching and still get eye-catching results.  As I told you earlier, I tested and decided to use 2 threads through a top-stitching needle to create a more prominent line of edgestitching.  Note that I used green thread on the grey and the white fabrics.  Since that wouldn't show on the green pocket, I used grey thread there.  (If you're visiting the blog for the first time, look at the previous post for more info.)

You know that it's typical to fold the pocket facing down to the wrong side of the pocket, then topstitch it in place.  Note that I used matching green thread to do that (just visible at the bottom of the photo) so it would not stand out or compete with the gray edgestitching.  There are so many details you can think about to easily bring more interest and artistry to your garments.  


Just as a reminder, I'm posting this photo again.  I used 3 strands of DMC embroidery floss to create these hand stitches, another option on this pattern.  On the collar, I wanted the stitching to show on both the upper and under sides, since I sometimes wear my collars up in the back, as shown here.  I also should explain that I edgestitched the collar in matching thread in order to keep the edges flat and crisp.  It just fades into the background, allowing the faux pick stitches to be the prominent decoration.

On the deep front pleat, shown at the bottom of the photo, I again stitched in matching thread to hold the pleat securely, then came back with the handstitching as the decoration.


This photo shows you the beginning of decorating the cuffs.  First I edgestitched in matching thread (single thread) to keep the cuff's edges flat and crisp.  Then I came back with contrasting thread to give myself a reference point for my faux pick stitches.


Here, my faux pick stitches are done.  As you can see, I used the basting (at 4.5 stitch length) to regulate the length of my stitches by stitching beside every other one.  I slipped my hand needle between the layers of fabric, unlike what I did on the collar.  At this stage, I just need to remove the basting to finish my decoration of the cuff.  

I like to use a seam ripper to break every 4th or 5 basting stitch on the right side of the fabric.  Then I go to the inside of the cuff, tug on the bobbin thread, and pull.  Voila--it just comes right off.  It's easy to pick up the remaining threads on the right side, and the whole process of getting rid of the basting takes 1 to 2 minutes.

We have a tool that really helps with the occasional thread that just doesn't want to come out (and with other stubborn stuff I'm trying to deal with).  These tweezers have claw-like ends that firmly grip those last unruly threads, and I love how much time and teeth-gnashing they save me.  Here's a pic:


You'll love these.  See those sharp little grabby things at the end?  They hang on tight!  I think you'll find them as helpful as I do.

If you get a few extra minutes, visit the Home Page at www.cuttinglinedesigns.com to see even more photos of Pick Stitch Perfect, then browse through the photos under Cool Stuff from CLD and look at all the other pages with goodies on offer.

If you have a question or a suggestion for a topic, please email me at sandy@cuttinglinedesigns.com.


Monday, July 1, 2019

Greetings to all our sewing friends at Cutting Line Designs,

I'm so glad you had time to visit today.  Since we've just introduced Pick Stitch Perfect, I'd like to give you a bit more information about the 5 stitching techniques we included in this new pattern.


Here's View A with "cheater" sashiko stitching details.


And View B with "cheater" pick stitching details.


So on to the details. So far, I've made 4 Pick Stitch Perfect shirts using the various stitch techniques.  You may be familiar with a couple of these techniques already.  

For instance, edgestitching right next to a seam is something you may do all the time.  For details, look at my post from June 10 that includes info about the machine feet that help make for perfect edgestitching.  

I made a second View B from shirt weight cotton printed with sewing motifs.  I used both edgestitching and topstitching to enhance the details on this shirt.


From the top left to the bottom right, note the line of edgestitching on the seam attaching the sleeve to the yoke and lower back.  Then look again to see both edgestitching and topstitching from lower left to upper right.  This stitching emphasizes the bottom edge of the yoke and perfectly matches the stitching on the upper and lower sleeve seam.  

That seam ends in a self-fabric placket--a really cool detail.  Here's a photo that shows the placket and the edgestitched cuff.  


Louise has written an article for Threads Magazine with instructions and color photos so you can see clearly how this clever placket is made.  Has your issue arrived yet?  It's the current one (issue 204, Aug/Sept 2019).  Nothing like getting it firsthand from the expert!

In my blog post of June 3, I showed you my denim shirt with 2-thread edgestitching and explained just how to do that stitching.  Here are a couple of details from a second version of View A (can you tell that I had fun playing around with this pattern?).

The first thing I did was make a sample.  The vision I have in my head doesn't always work, so testing gets me to the best result.


I immediately saw that the single thread stitching on the right was not bold enough to stand out on my chosen fabric.  I switched to the 2-thread stitching on the left.  Much better! 


View A calls for 3 fabrics.  I chose grey, white, and green.  Here's my left sleeve with 2-thread details.  I used green thread on the white upper sleeve and grey thread on the green lower sleeve.  


Here's the green pocket, 2-thread edgestitched in grey thread.  Just above it is the seam joining the grey right front and the white left front, 2-thread edgestitched in green.  I had a good time with this top!

On the original View B I made, I experimented with what Louise calls "cheater" (or faux) pick stitching, done by hand.  Traditionally used on men's suits, it's usually stitched through only the outer layer of fabric and enhances lapels, collars, and so on.  It's fairly subtle, and adds to the value of the garment.

Our version starts with that basic idea, then plays around with it.  For example, I used 3 strands of embroidery floss in a hand-stitching needle, and I chose a bold color that stands out on the fabric.


Here you can see the stitching on the collar and on the front pleat.  On the collar, I stitched through all the layers of fabric so the stitches would show both on the top and the underside of the collar.  On the front pleat, I stitched the pleat by machine first, using matching thread.  Then I came back with the hand-stitching, sliding my needle between the layers of fabric.  

I also used this stitching on the shoulder seams, the bottom yoke seam, the upper/lower sleeve seam, the armhole seams, and the cuffs.  

The "cheater" (or faux) sashiko stitching is similar, but even more bold.  I basted at a stitch length of 6.0 for this stitch, then threaded my hand needle with 6 strands of embroidery floss and stitched away.  


Look carefully.  You can see that I edgestitched the pocket in place by machine, using green thread.  Then I came back and basted at a 6.0 stitch length.  Using my embroidery floss, I came up from the wrong side of the fabric at the top corner of the pocket, right at the beginning of a machine-basted stitch.  At the other end of that basted stitch, my needle went back down into the fabric.  I skipped a stitch, came back up, and continued in the same manner around the pocket, skipping every other stitch.  After removing the basting, I have this result.


Here's the same technique on a sleeve.  The upper and lower sleeves are sewn together.  Then machine basting goes on each side of the seam (6.0 stitch length).  I hand-stitch over every other basting stitch, then remove the basting.  Voila!  Faux sashiko!

For my next post, I'll take some photos in mid-process to show you how the hand-stitching and machine basting work together.  See you then.

Let me know your thoughts about suggested topics for the blog by emailing me at sandy@cuttinglinedesigns.com.