I've missed you! We've been working on a project that we hope you'll be seeing soon. In the meantime, I thought I'd shed a little light on a simple technique and share a reminder that a pattern is just a starting point for your individual design sense.
Let's see what that means. Louise found this coat online (by Gudrun Sjödén) that looks so much like our Anything But Ordinary jacket made longer. She posted it on the Facebook Forum as inspiration for anyone who might be thinking that she'd like a cute coat this fall.
It's a good reminder that we are our own designers. So you can choose a jacket pattern, make it longer, and proceed with your own coat. Choose the fabric, the length, the details, the buttons that you want. You'd never find that particular combination in a store.
Notice the similarity between the coat's collar and the collar in the pattern. This could be made any length and from a lightweight to a heavier fabric---so start imagining.
So here are a few tips about lengthening patterns. Of course, it's a simple thing, but like anything else about adjusting patterns, it helps to do it accurately. So here's what I do.
First, I iron the pattern with a warm, dry iron. No steam--ask me how I know! I can't get good results if there are wrinkles.
Then I cut the pattern on the lengthen/shorten line, obviously. (You do have to consider whether that would interfere with pockets, etc. so you could draw a line in another spot if needed.) Then I slide tracing paper (from a medical supply store; it's really the stuff on the doctor's exam table) under the cut edge of the upper Front.
I won't tell you how many years it took for me to realize that taping the pattern to the tracing paper is so much easier if I lay a ruler right beside the edge I'll be taping. That way, the pattern tissue doesn't fly up and get stuck on the tape with lots of wrinkles in it. Ever happen to you?
So if I want to add 2 inches to the length of my jacket, I'll use my ruler to draw an accurate line 2" below the lengthen/shorten line. But I also continue some relevant vertical lines, like the grainline, center front line, perhaps a foldline. That way, I can align the bottom portion of the pattern exactly in the right place.
Here, I have the lower part of the pattern below its final placement, just so you can see the lines I drew for the alignment.
Finally, I tape the lower part in place, using the ruler to hold the edge of the pattern tissue down again.
They're all such simple steps, but I spent years fiddling with trying to place both pattern pieces before I taped anything down, then using little bitty pieces of tape so I didn't wrinkle everything up. The extra alignment lines and the ruler placed before taping have just helped avoid so much frustration and ensured accuracy.
One student who attended a retreat with us, and who evidently had the same frustrations, said that the ruler trick was "worth the price of admission."
So who's ready to start making a coat? If you do, email us a photo when you're done or post it on the Facebook Forum. I'd love to see your work. You can email me at
sandy@cuttinglinedesigns.com with questions or suggestions for topics.
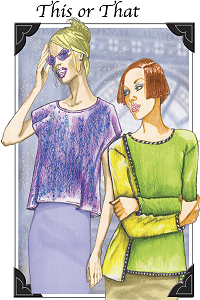
I'll be teaching a class in September to show you so many variations on the simple idea of the Boxtop in This or That.
Here's the pattern:
And here's my winter variation, a snuggly, warm, sweater-like version to layer over another top. See the Events page for more details. I'll be adding more ideas shortly.


